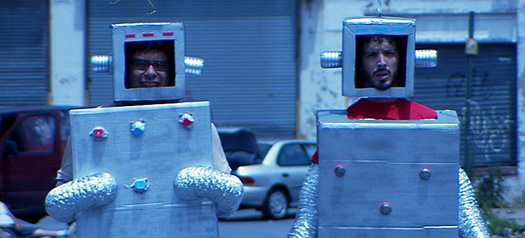
It is the distant future. The year 2000… Things are very different since the robotic uprising of the mid-nineties…
– Flight of the Conchords
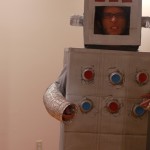
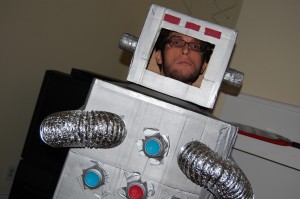
Halloween is almost here, folks. And here at Base14 we couldn’t help but salute the much-loved HBO comedy show, Flight of the Conchords. If you haven’t been living under a rock for the last two years, you’ll know that FotC made robots cool again with their aptly titled song and music video: Robots. So of course, just as many other FotC fans are doing this season, I had to make my own Robo-Boogie Costume. The best part is: I’ve documented the entire process below, so everyone at home can follow along!
Step 1: Gather Supplies
One of the appeals of making your own FotC robot costume is it’s easy and cheap. Bret and Jemaine did us the courtesy to make the mundane appealing. So there aren’t many things you’ll need.
- Large cardboard box (approx. 80cm x 50cm x 30cm)
- Small cardboard box (approx. 25cm x 25cm x 25cm)
- Duct tape
- Silver spray paint
- 4-inch diameter dryer vent tubes
- 6-inch diameter dryer vent tubes
- Wire coat hanger
- Bright red paint
- Turquoise paint
- Empty water bottles
- Other old bottles/cans/bottle caps
Step 2: Make Blueprints
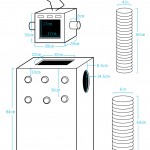
Now, if you’re one of those impulsive types that likes to jump into things with no planning, proceed to step 3. Otherwise, make sure you have a good schematic for you costume design. I took screen shots from the show and used the water bottle diameter as a ratio for determining the dimensions of the rest of the costume. Yeah, I’m that analytical. Here’s the final schematic. I had to nudge the numbers a bit to match my box and fit my body type. So adjust appropriately.
Step 3: Cut Out the Body
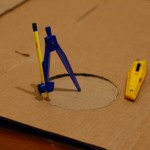
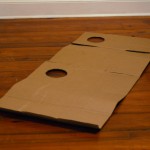
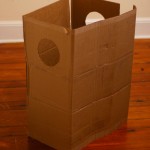
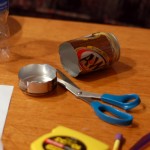
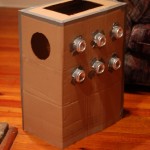
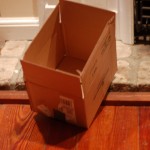
We’ll start with the robot’s body. I took a box and cut it down to fit the dimensions I wanted, then flattened it out into one sheet so I could cut out the arm holes. I used a compass to get nice clean circles, and cut them out with a mat knife.
Step 4: Add Function Buttons
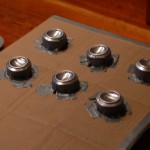
Another important thing to add while the body is still flat is the function buttons. I am not sure what they used on the show (my best bet is Bret’s buttons are bottle caps and Jemaine’s buttons are the bottoms of 20-liter soda bottles). I took some artistic license and used the bottoms of aluminum cans, due to their smooth, button-like qualities. I suggest you just use whatever you’ve got lying around. These would be best attached with hot glue, but I don’t have a glue gun so I improvised with duct tape.
Step 5: Assemble Body
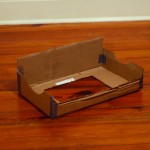
Once your holes are cut and function buttons affixed, it’s time to assemble the body. The more duct tape used in the step, the better. I needed extra cardboard to make the top of the body, so I built it separately with reinforced corners. I designed it to fit the circumference of the body precisely. Then I wrapped the body sides around the top piece and taped them up to get a nice, strong body.
Step 6: Build the Head
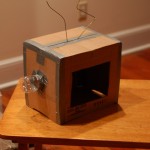
Now that the body has been built, it’s time to construct the head. For this it’s good to find a single, small box that’s nearly a cube. I had to pull up the flaps on mine to get the right shape, but it worked.
Once you’ve got your box, there’s three main features to add: face hole, side bolts and top antenna. Make the face hole close to a square, leaving a little bit more room on the forehead for colored stripes. The most important thing, though, is just to make sure you can see out. After that attach the head bolts, which are the bottoms of water bottles. Again, hot glue would be ideal for this, but I got by with duck tape. Don’t worry that they’re clear now, the spray paint will make them opaque. Finally, I used a wire hanger to make a head antenna. If you want an antenna like Bret’s, you should find a broken TV set with one of those circular antennas.
Step 7: Paint
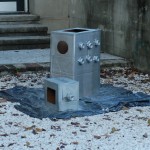
Well, now that all the construction is done, it’s time to paint this sucker! Myself and a friend who made his own robot costume both found a full can of spray paint barely covers the entire suit. So if you want a really heavy coat, I suggest you buy two cans. I let mine dry overnight before the next step.
Step 8: Final Touches
With the costume painted, it’s time for some final touches! The thing really comes to life with the addition of a bit of color, so I went out and bought the cheapest acrylic paint I could find and colored the function buttons red and blue. I also painted some tape red and put it on the helmet forehead, but if you have red tape to begin with, that’s even better. Finally, don’t forget the extremely important dryer vents for arms and legs. Through careful research, I decided that the arms should be 4-inch diameter vents and the legs 6-inch diameter vents. I got cheap and only bought the 4-inch, so my legs went un-robotized. I suspect that to keep the leg vents help up, one would need to make a duct tape belt or suspenders of some sort. It was difficult enough keeping the arm vents from slipping down. This issue requires further research.
Step 9: Boogie!
Robo-Boogie, that is. With the final touches your costume is complete and you’re ready to hit the town. Make sure to practice your dances before heading out, because the suit does cut down your mobility a bit. But if you use it to your advantage, you’ll be the hippest post-apocalyptic mechanical being on the scene.
Binary Solo! 00000001. 00000011. 00000111. 00001111!


[…] been wanting to get into the free tutorial business for a while now, and while my well-documented robot instructions were a nice beginning, our company is probably better suited toward software tutorials. So today we […]